Microsoft Graph is the gateway to data and intelligence in Microsoft 365 and a great tool to manage your organization. In this article, we will focus on the Microsoft Graph API, one of the three components of Microsoft Graph.
Microsoft Graph API is a Restful web API that allows you to access Microsoft Cloud services and control them from your highly specialized, custom-built applications or simple API calls. You can quickly develop solutions integration with many services such as Microsoft Teams or Microsoft Calendar. It is very flexible and provides libraries for an extensive range of programming languages and platforms. In this article, we are going to use Python for its code readability and simplicity.
Before we start coding our sample application, we need to determine what abilities Microsoft Graph API has. We can scroll through conventional documentation, or we can use Microsoft Graph Explorer, a developer tool that lets users conveniently make Microsoft Graph REST API requests and view corresponding responses.
We will use the second solution to speed up our development process.
In order to use Microsoft Graph Explorer, we need to log in to the Graph Explorer website with our Microsoft account.
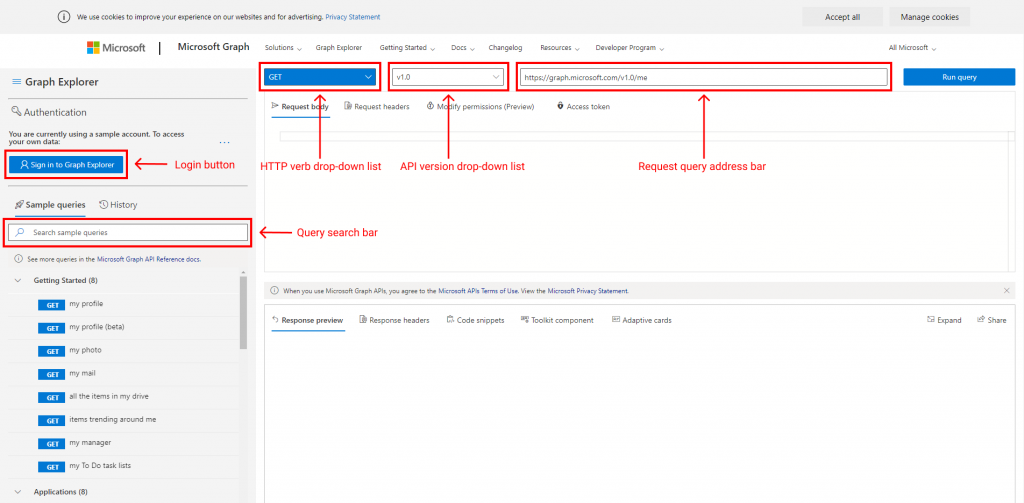
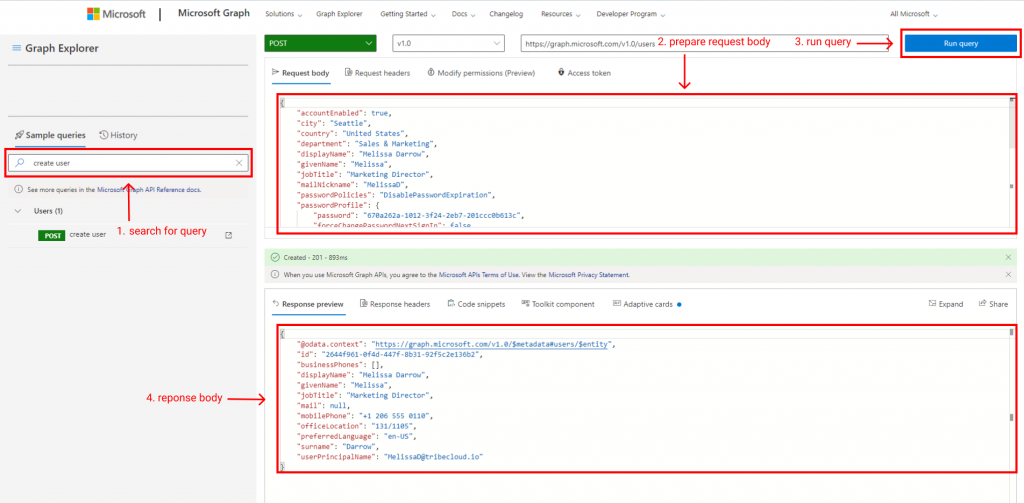
After successfully signing in to the Graph Explorer, we can check query availability in the bar marked as ‘Query search bar’ in the picture above. We are going to create a new user account so we will search for a create user query. Next, you can populate the request body with your own data, but in this example, we will use the sample data provided by Microsoft. At last, we can create a user by pressing the Run query button.
As we can see, using Microsoft Graph Explorer is intuitive and simple. Now, we are going to do the same thing using Python. We are going to avoid using the Microsoft Graph library in order to maintain high readability of the code.
Before we start coding our application, we need to register our application in Microsoft Azure in order to get credentials. We are not going to deep dive into this process because there are a lot of tutorials about it available on the internet. In a few words, we need to:
- Register our application in Microsoft Azure App registrations.
- Create client secret in the registered application.
- Add permissions to the registered application:
- Directory.AccessAsUser.All
- Directory.ReadWrite.All
- User.ReadWrite.All
- Assign user accounts that we created in Graph API Explorer to this application via: Azure Active Directory -> Enterprise applications -> <our_application_name> -> Assign users and groups.
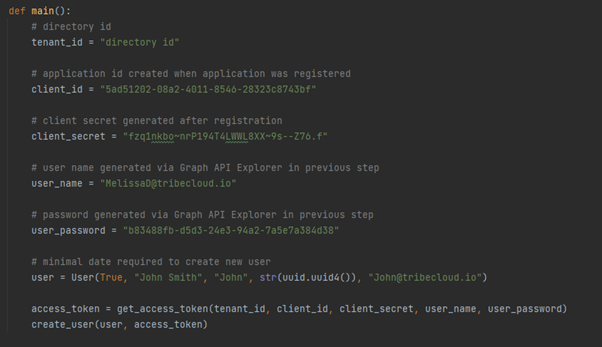
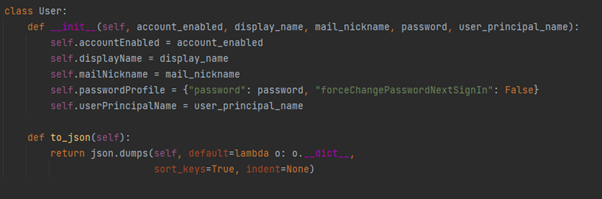
Now, it is the time for the cream de la crème of this article: creating users via python code. First, we will create a User class that contains the minimum required fields for creating users, and the to_json method that converts user objects to json.
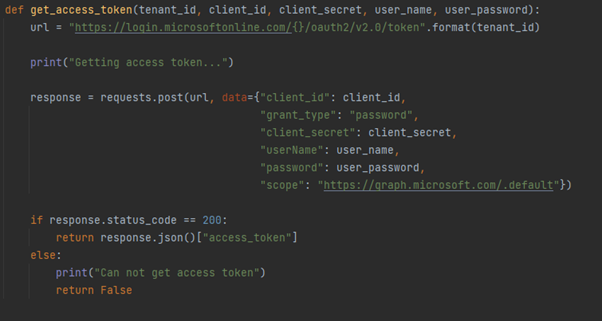
The next step is to create a function to get an access token to the Microsoft Graph API. It consumes data acquired during application registration, user name, user password, and return token.
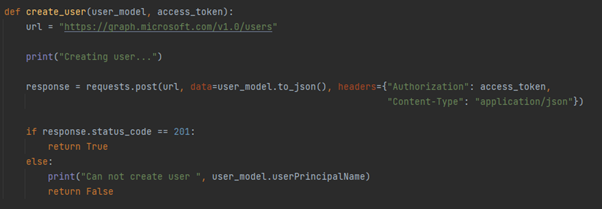
Now, we can create a function responsible for creating users. It consumes user objects created earlier and an access token.
Finally, we will create a main function containing create_user and get_access_token function and all required fields. After launching the main function, it should create a user.